How to list your products on Tata CLiQ
As a fashion retailer, you need to be where your shoppers are. This makes it imperative to list your products on multiple marketplaces and online channels.
However, listing on marketplaces poses some challenges. Some of the common ones are:
- Multiple templates to download, fill and keep track of
- Different taxonomies to follow for different marketplaces
- Each marketplace has specific template guidelines that you need to follow
- Images need to be optimised as per each marketplace's guidelines
And the list goes on. Retailers struggle with cataloguing teams to ensure consistency of data and faster turnaround times.
In this series of posts, we will guide you through the steps of setting up your account as well as product listings. Although some products will be unique and may require additional fields, this step-by-step process will cover the basics.
HOW TO GET STARTED ON Tata CLiQ
Step #1: Create a Tata CLiQ seller account
If your company does not already have a Flipkart Seller account, the first step is to create one. Register here or sign in with your seller account.
The account creation to become a merchant on Tata CLiQ requires you to send an email to sellersupport@tatacliq.com. The email should include basic personal information like name, email ID, verification, and identification details along with a summary of the products to be sold.
The next step would require both parties to sign an agreement. You are required to have the following documents:
- Company Logo
- VAT and CST Copy
- Service Tax Copy
- TAN Copy (If Available)
- Pan Card Copy
- CIN Copy (from ROC)
- One Cancelled Cheque
Once these details and documents are submitted and verified, your seller profile is complete. You can now start listing your products and selling them on Tata CLiQ marketplace.


Step #2: Upload product images on FileZilla
Unlike other marketplaces, Tata CLiQ requires you to upload product images separately on FileZilla in the order specified by them. Tata CLiQ creates the FileZilla account for the merchant and the account details are shared with an SFTP number and password for login. The images need to be named in the ‘Seller code_SKU code_position of the image’ format. Once the images are successfully uploaded, you are required to complete the process of downloading templates to list your products on the marketplace.


Step #3: Download the correct product listing template
The next step is to ensure that you download the right product listing templates for your product category. Each of Tata CLiQ’s product categories has unique templates categorized by gender. These templates come in an excel format and include a list of mandatory attributes as well as optional attributes that need to be filled in for each product SKU. It is best to avoid the common mistake of choosing the wrong template, as this will ensure your feed’s rejection along with wasted time.

Step #4: Fill in the product listing template accurately
You are required to fill in specific details mandatorily for products such as product category, seller SKU, brand name and product ID among others. Other optional fields can be chosen to be filled or not depending on the seller.

Step #5: Listing the products
This step requires you to upload the product listing template onto the Tata CLiQ seller platform. This is done either by selecting ‘Create a new product’ (for a single product) or ‘Product bulk download/upload sheet’ (for multiple products). You are provided with a unique Ticket ID and tracking information regarding the success or failure of listing for each upload.
- Click on ‘Product listing’ in your Tata CLiQ seller account.
- Choose to add a single product by clicking 'Create a new product’ or upload in bulk by clicking ‘Product bulk download/upload sheet’.
- For both single and bulk listing, select your desired product category, then upload the CSV file.
- Once uploaded, if there are errors, the file gets downloaded automatically with the list of errors indicated.
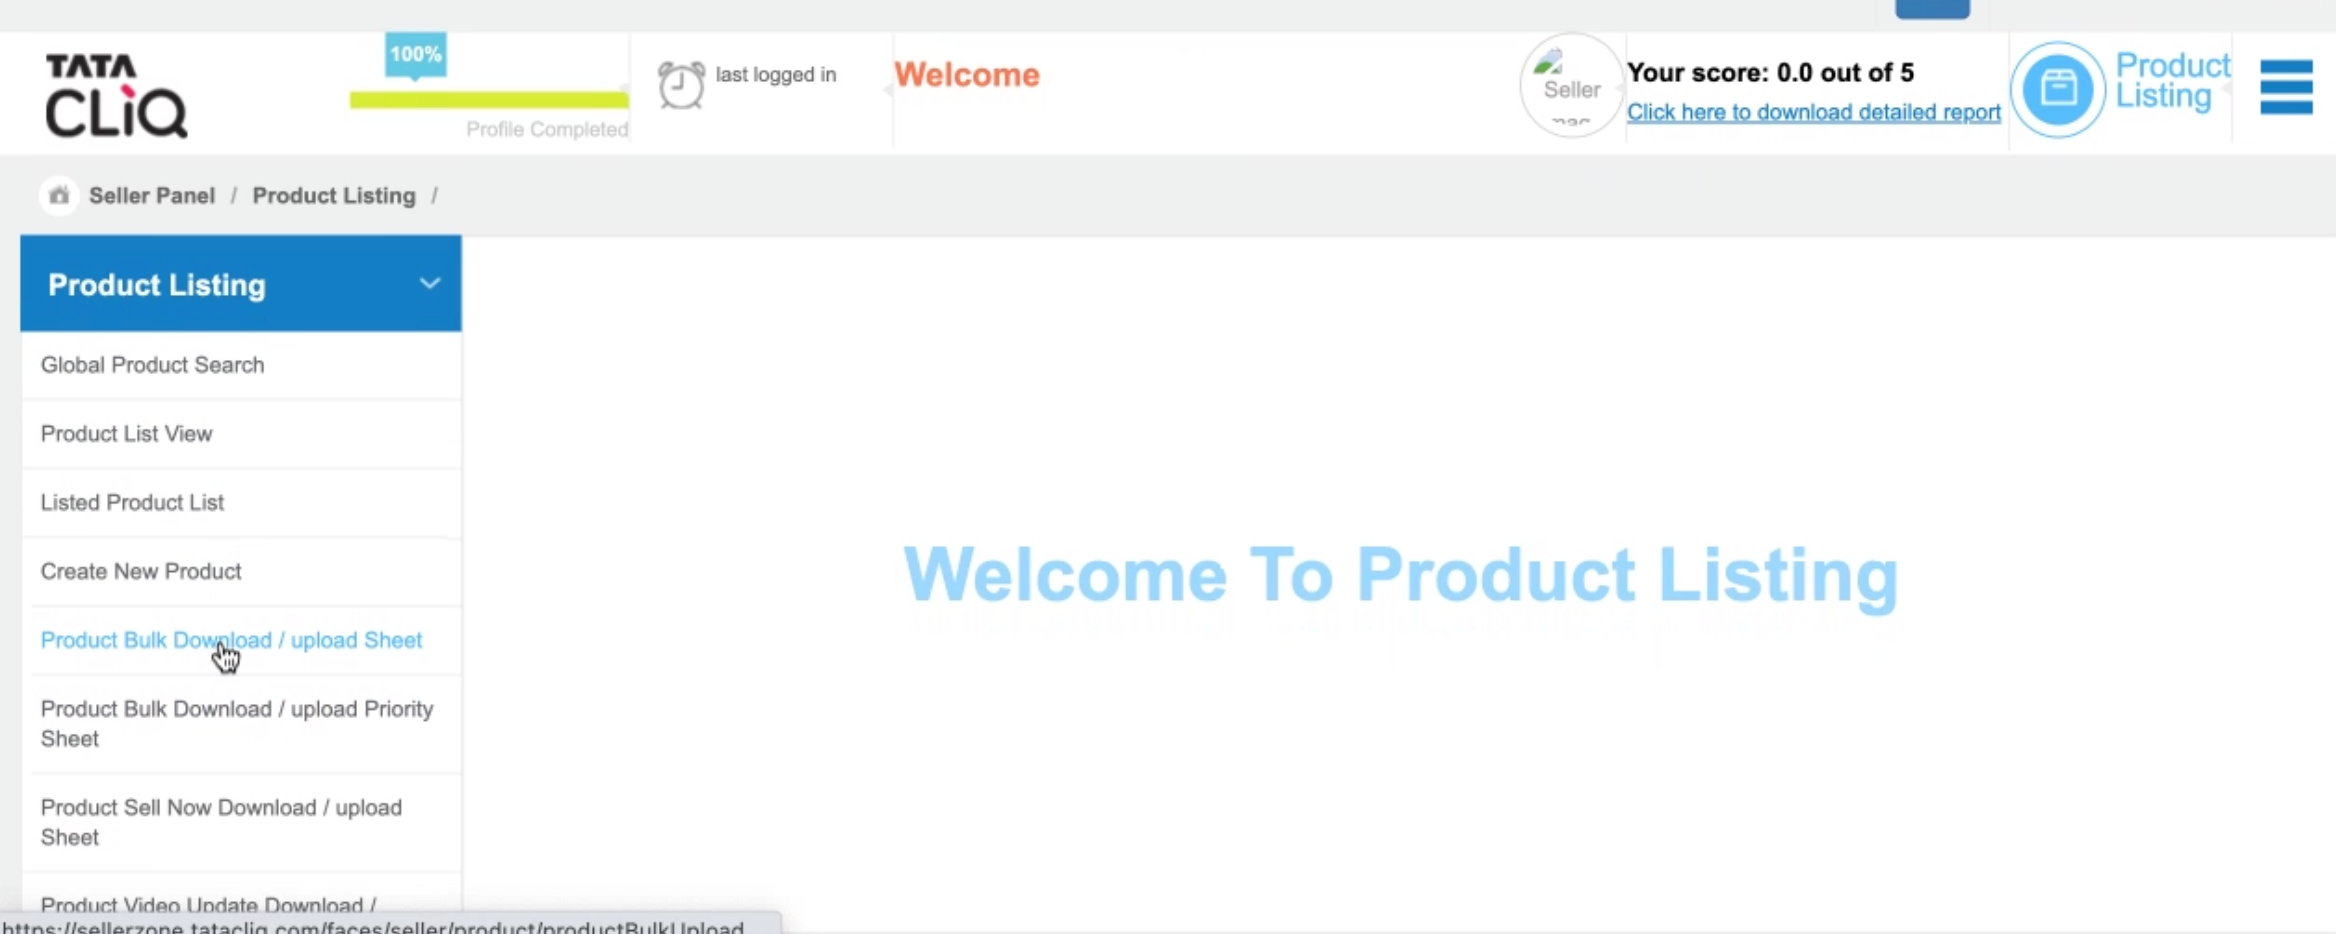
To check the for the successful listing of a product, click on ‘Listed product list’ and browse for the category to find the product.

Step #6: Errors/Failure in the product listing
This step is optional and is needed only if your product listing template has failed to list. A list of errors along with the products is presented on the downloaded excel file. To complete a successful product listing, they must be corrected and re-uploaded.

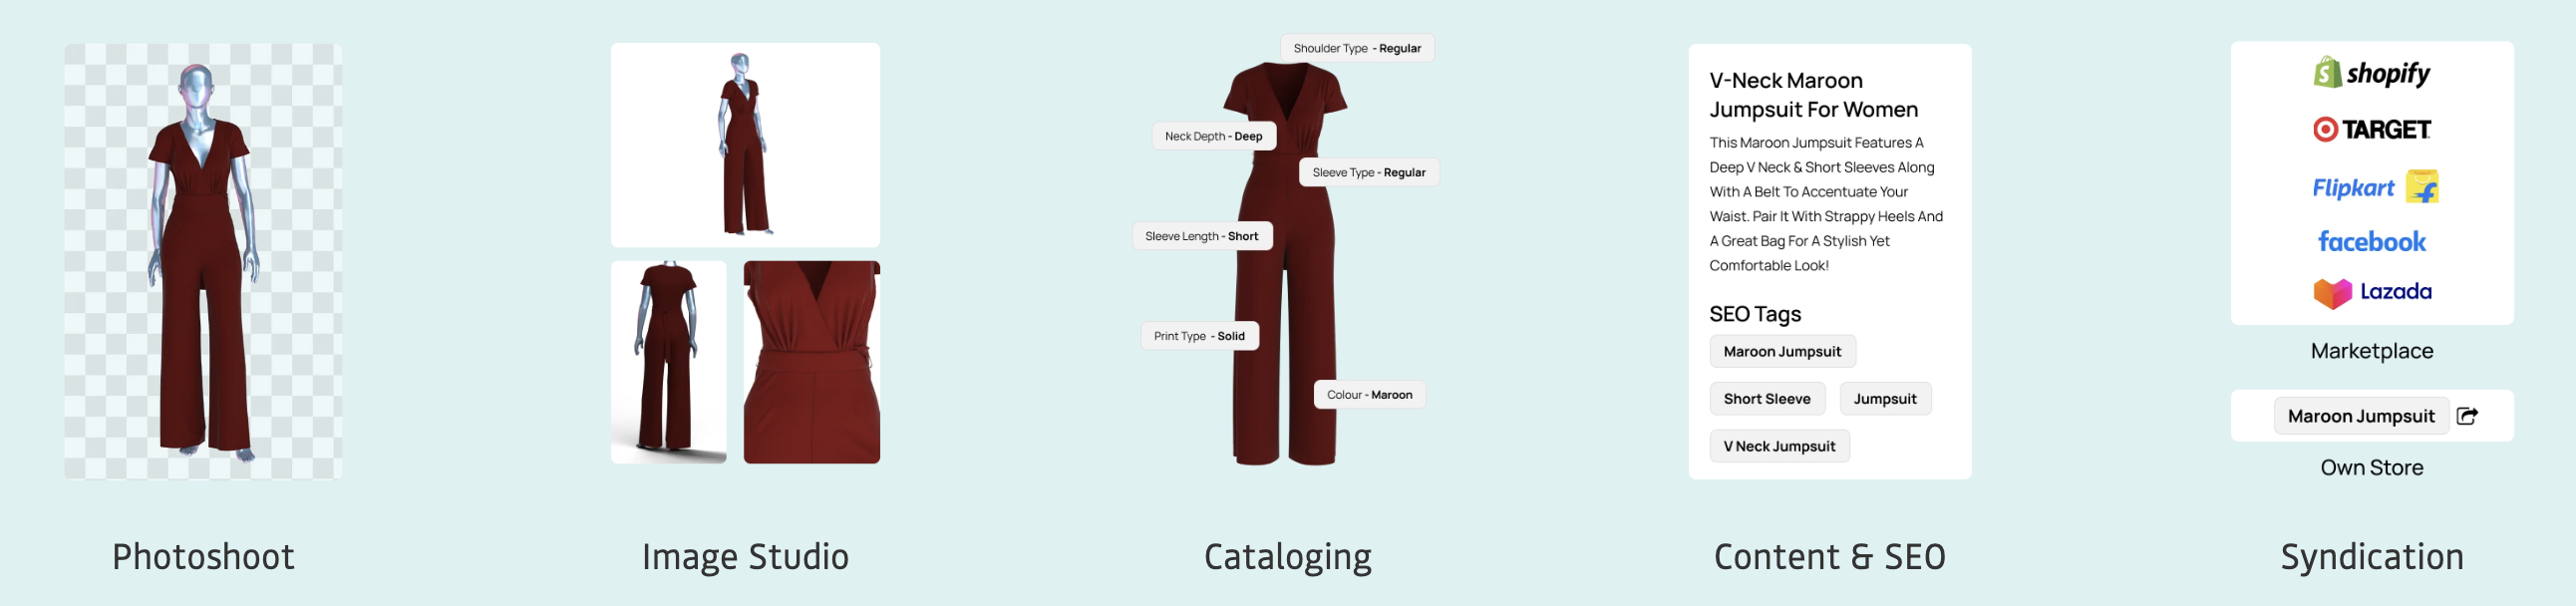
CATALOGIX
Catalogix is an AI-powered cataloging and feed management solution that gets you from products to multiple marketplace and channel listings in a couple of hours. Once your seller account is created, complex excel sheets have to be filled and uploaded to list on marketplaces. Catalogix automatically fills all the mandatory attributes, including product titles and descriptions along with creating relevant image links/folders as per that marketplace's requirement. We even provide end-to-end support and handle upload and rejection management as well.
Schedule a call with us today to find out more!
Read Next : How to list your products on Meesho

Building Trust in E-Commerce: The Ultimate Guide for Success